This is the second article on Consent Mode and provides you with a walkthrough on how to actually implement it. Make sure to jump to the first article as well to get a full grasp on what Consent Mode is, how it works and its key features.
Below we describe the following 4 main steps to implement Consent Mode via GTM:
- Create Default Tag
- Create ad_storage and analytics_storage variables
- Create Update tag
- Adapting Consent Mode settings per tag
1. Create Default Tag
The default tag needs to be fired on all pages at the very first moment a page is loaded with the aim to set the consent to a default situation. A situation where we assume no consent is given.
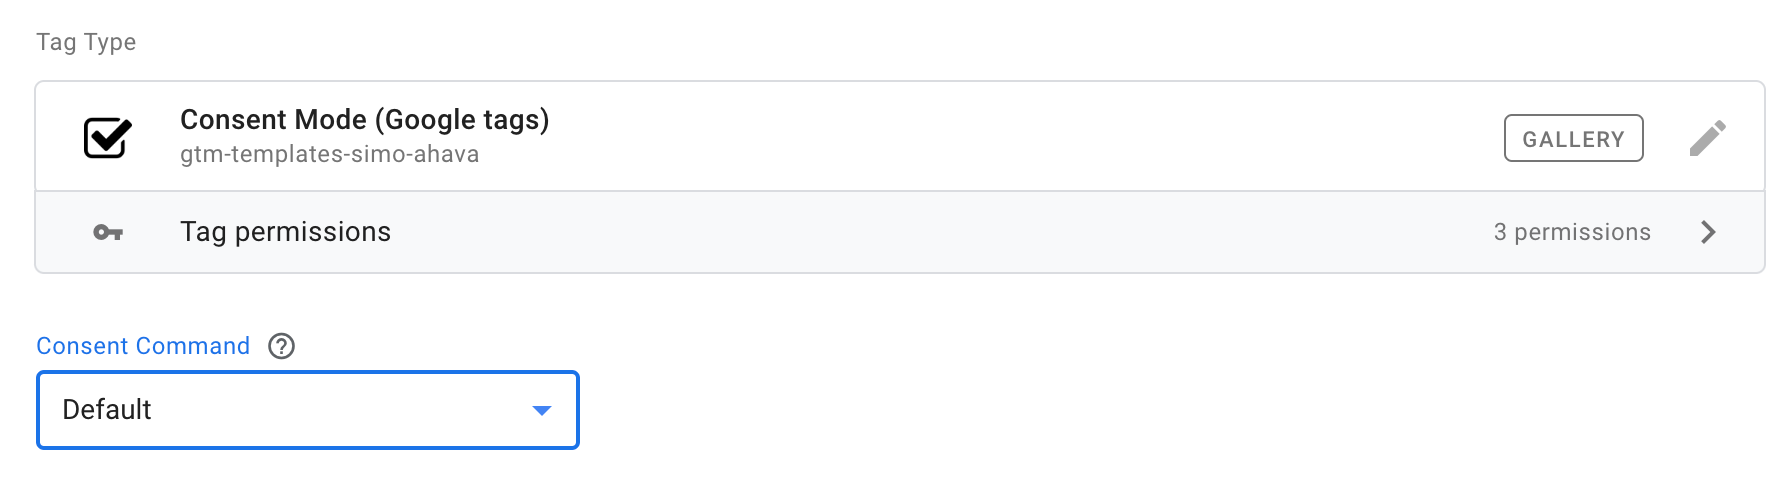
To implement this tag, start by creating a new tag and navigate to the community template gallery. Here you can find an easy template for the Consent Mode tag directly from your CMP or you can use a standard one from for instance Simo Ahava, which we will continue with. For the default tag, make sure the default command is selected from the dropdown.
Now we need to define the state of the new ad_storage and analytics_storage variables that will be used to indicate whether consent has been given or not. These have two states either “granted” or “denied”. Remember, in the default tag we define the default scenario when no user has granted consent. Thus these variables will need to be set to “denied” in order to be GDPR compliant. Next to that, you can define this by region and indicate a waiting time needed for the update:
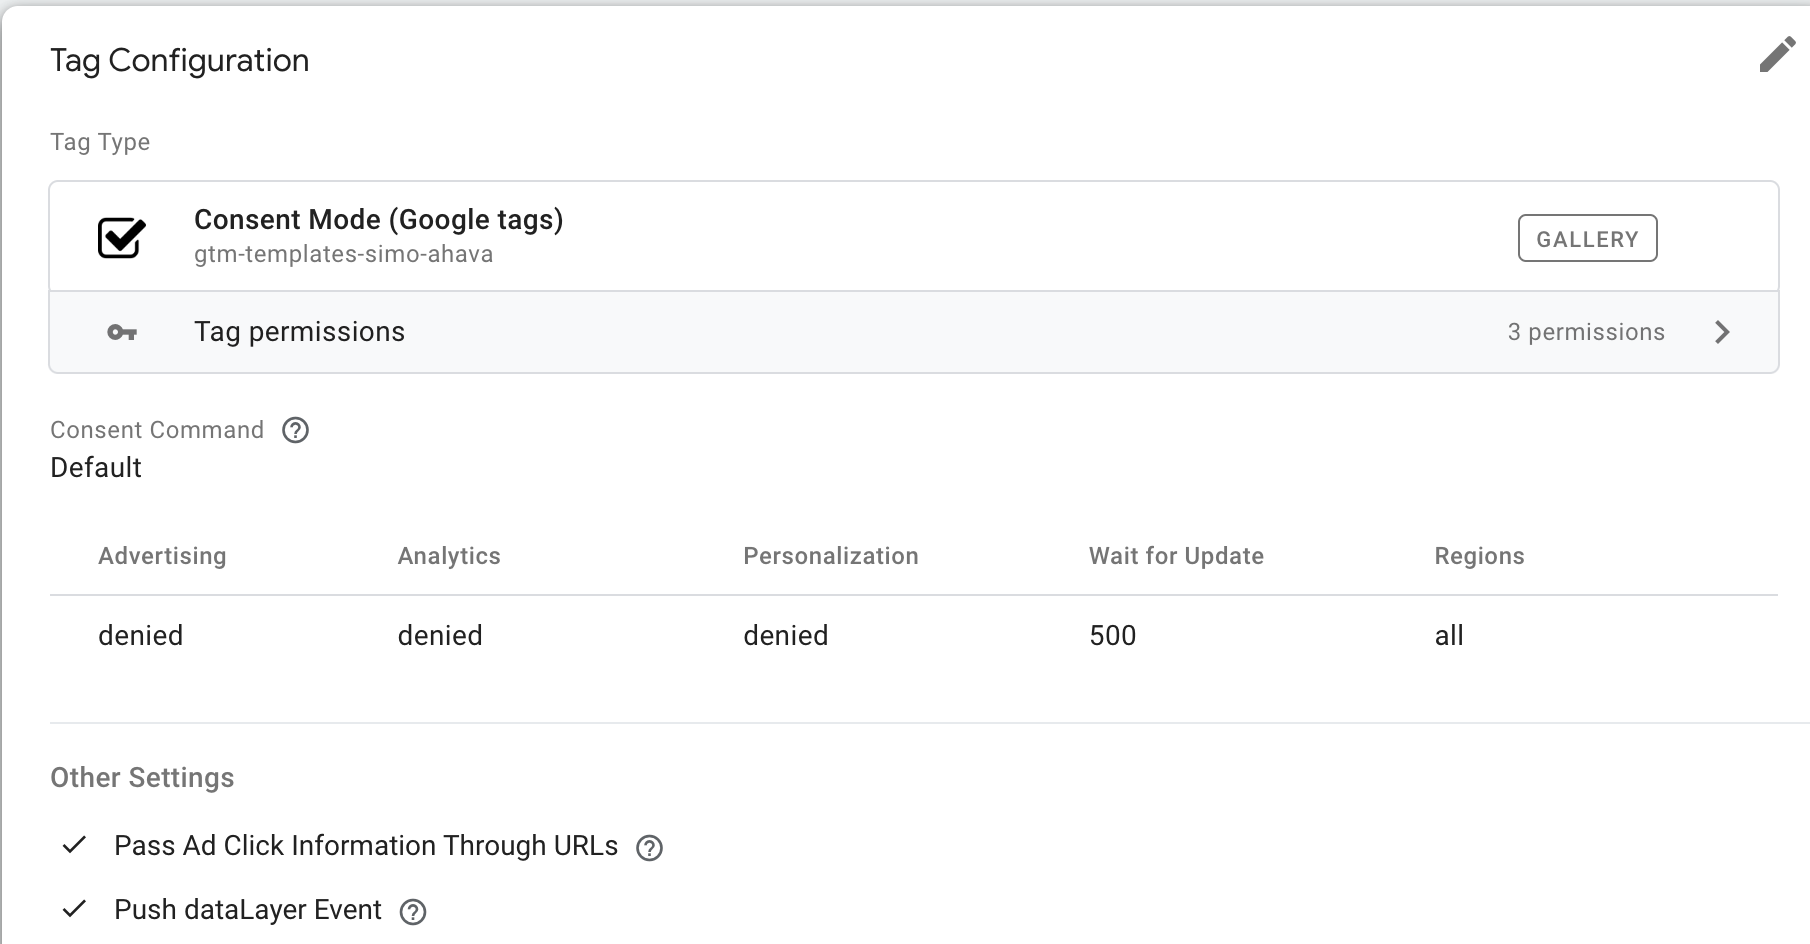
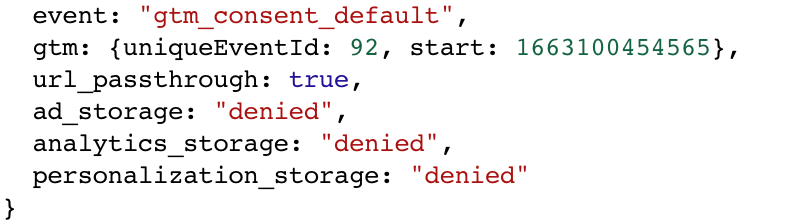
In the advanced tag settings you can toggle on the push of dataLayer events which make it easier to debug as you can see the values pushed for the variables by the default tag:
As mentioned we need to make sure this default tag fires before anything else on the page. Therefore GTM has provided a new build in trigger you can use, namely “Consent Initialization - All Pages”.
2. Create ad_storage and analytics_storage variables
Before creating the update tag that will each time update the state of the user consent, we need to capture this state of user consent in two new variables in GTM that have the output “granted” or “denied” depending on the chosen consent. One for the ad_storage representing the advertising cookies and one for analytics_storage representing the performance cookies. Note that the way these variables are made is specific for the CMP you have. Furthermore, for some CMPs, it is not needed to create separate variables but you can directly configure them in the tag template of that CMP.
3. Create the Update tag
This update tag will also fire on all pages, but after the default tag, in order to update the ad_storage and analytics_storage variables to the actual state (“granted” or “denied”) depending on the choices of the user. This is done by using the variables created in the previous step.
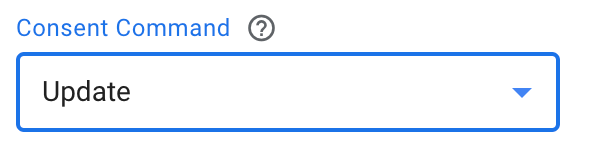
You can again create a new update tag using the template of either your CMP or a general one like the one of Simo Ahava. Now the command should be put at update:
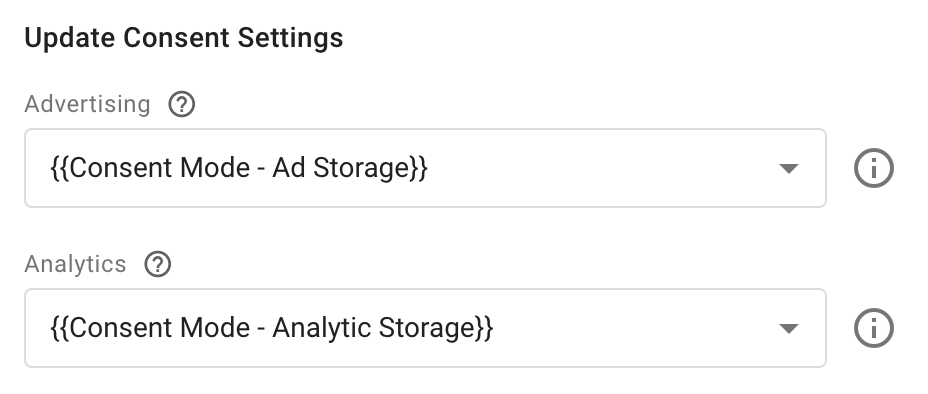
We again need to define the value of the ad_storage and analytics_storage using the GTM variables we created in step 2:
This tag will also need to trigger on all pages before other tags but after the default tag. Again, GTM has provided a new build in trigger for this called “Initialization”.
4. Adapting Consent Mode settings per tag
At this moment, the ad_storage and analytics_storage variables are automatically updated on all pages to the consent given by the user. Only one task remains: the update of consent settings in the tags directly. Note this is possible for ALL tags and can be done under advanced tag settings:
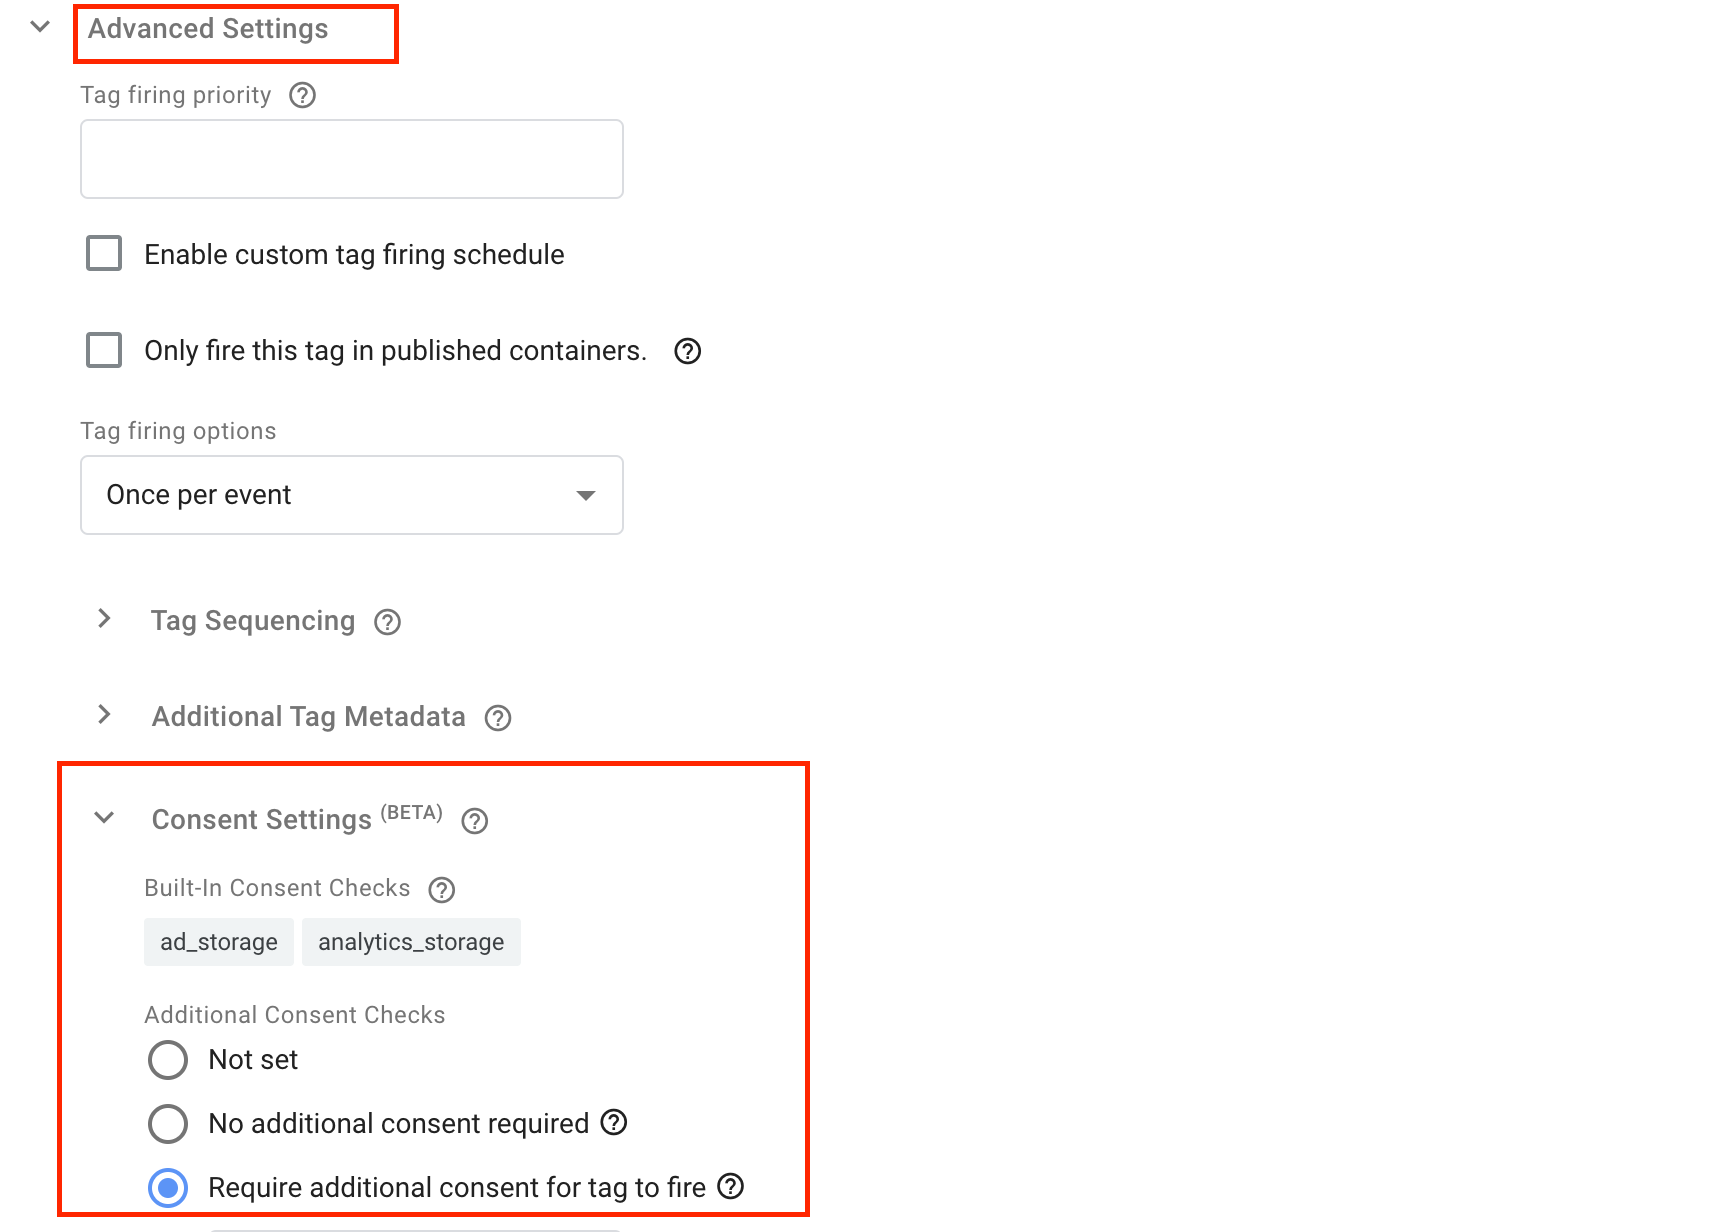
Depending on the tag type you will require ad_storage or analytics_storage to be granted.
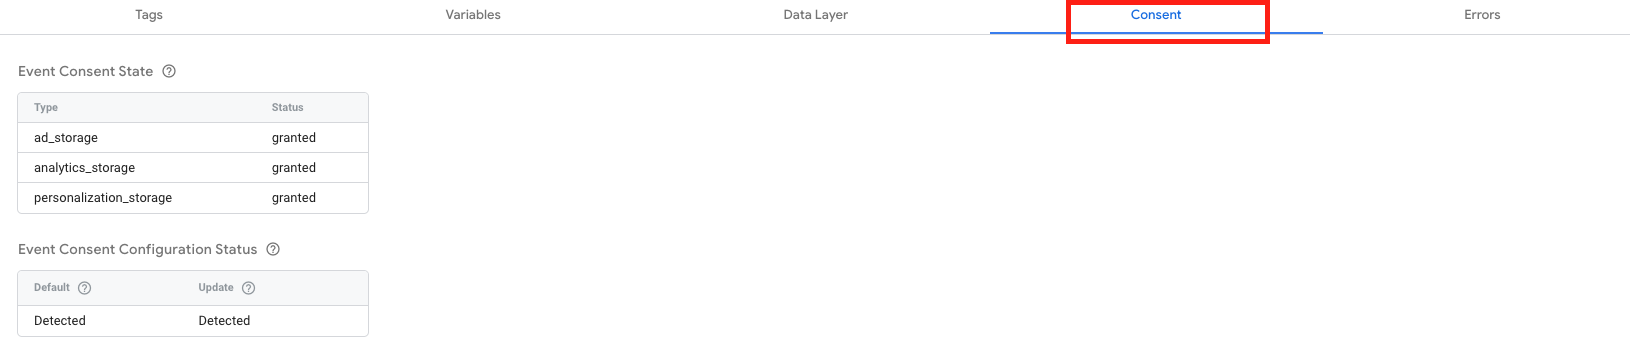
Finally, once the Consent Mode is set up you can use the preview mode of GTM to debug and follow how the Consent Mode is behaving in the consent tab:
That wraps up the implementation of Consent Mode, now you should be able to install Consent Mode yourself.

Lotte Vranckx
| LinkedinThis email address is being protected from spambots. You need JavaScript enabled to view it.