
In this article I’ll explain how to add weather information to your Google Analytics data using Tealium. This article is rather technical, so if words like JavaScript, JSON, PHP and server scare you, this article might not be the right article for you.
Collecting the weather data
First we need to collect the weather data for the current location of the visitor. We can do this with a simple PHP script on our server that gets the current location of the visitor based on the visitor’s IP address and then looks up the weather information for that location. We’ll upload this script to our server and name it weather_script.php.
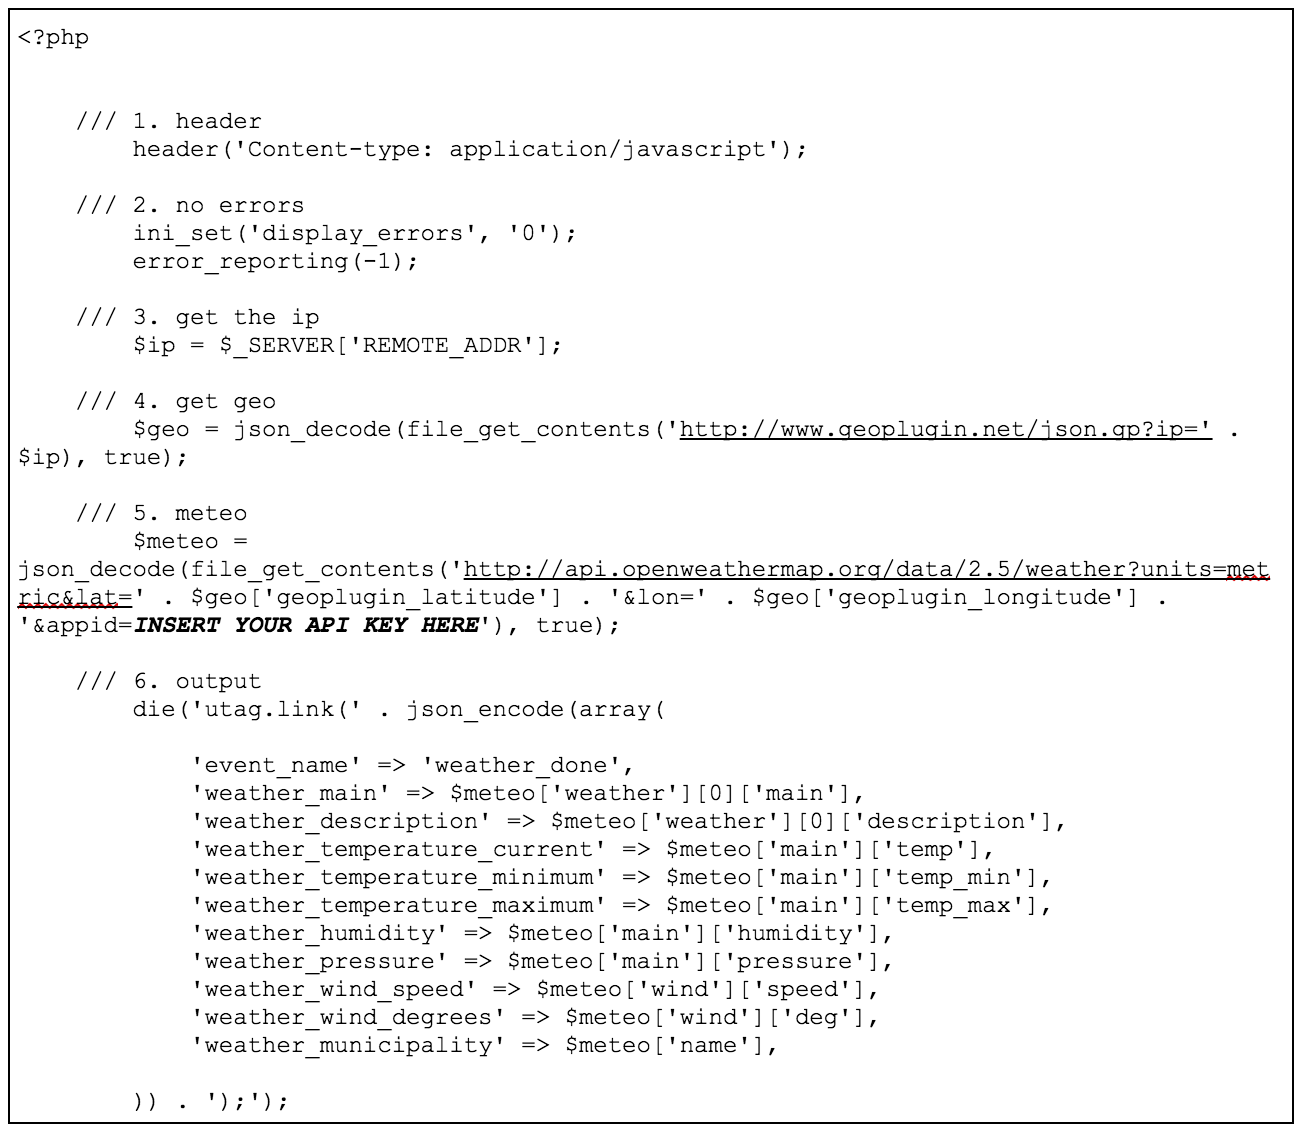
Here are the steps in the script explained:
- Our script will be outputting JavaScript, so we send the correct header info to the browser.
- We don’t want to output script errors when something goes wrong, so we disable them here.
- Here we get the IP address of our visitor.
- With the Geoplugin service, we can get the corresponding geolocation info for our visitor’s IP address.
- When we have the geolocation data, we can get the actual weather info for that location. Note that you need to register for a free API key in order to use the Open Weather Map service.
- Here we output the weather data to the browser in a JavaScript call to utag.link so it’ll end up in our Data Layer.
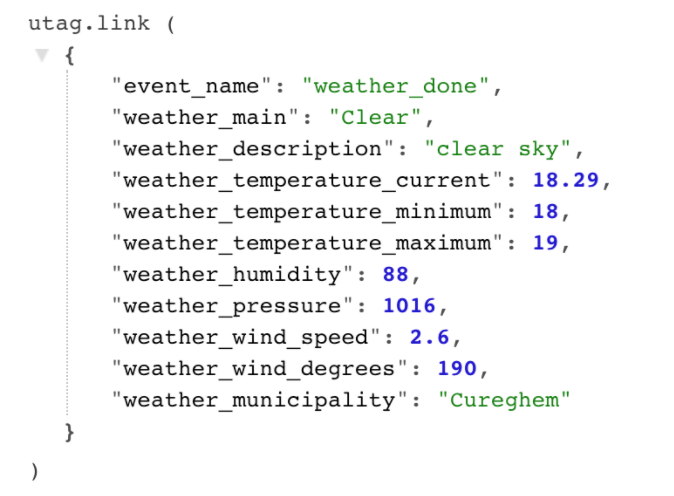
This PHP script, when called from a browser, will output a JavaScript function call similar to the following:
Data Layer
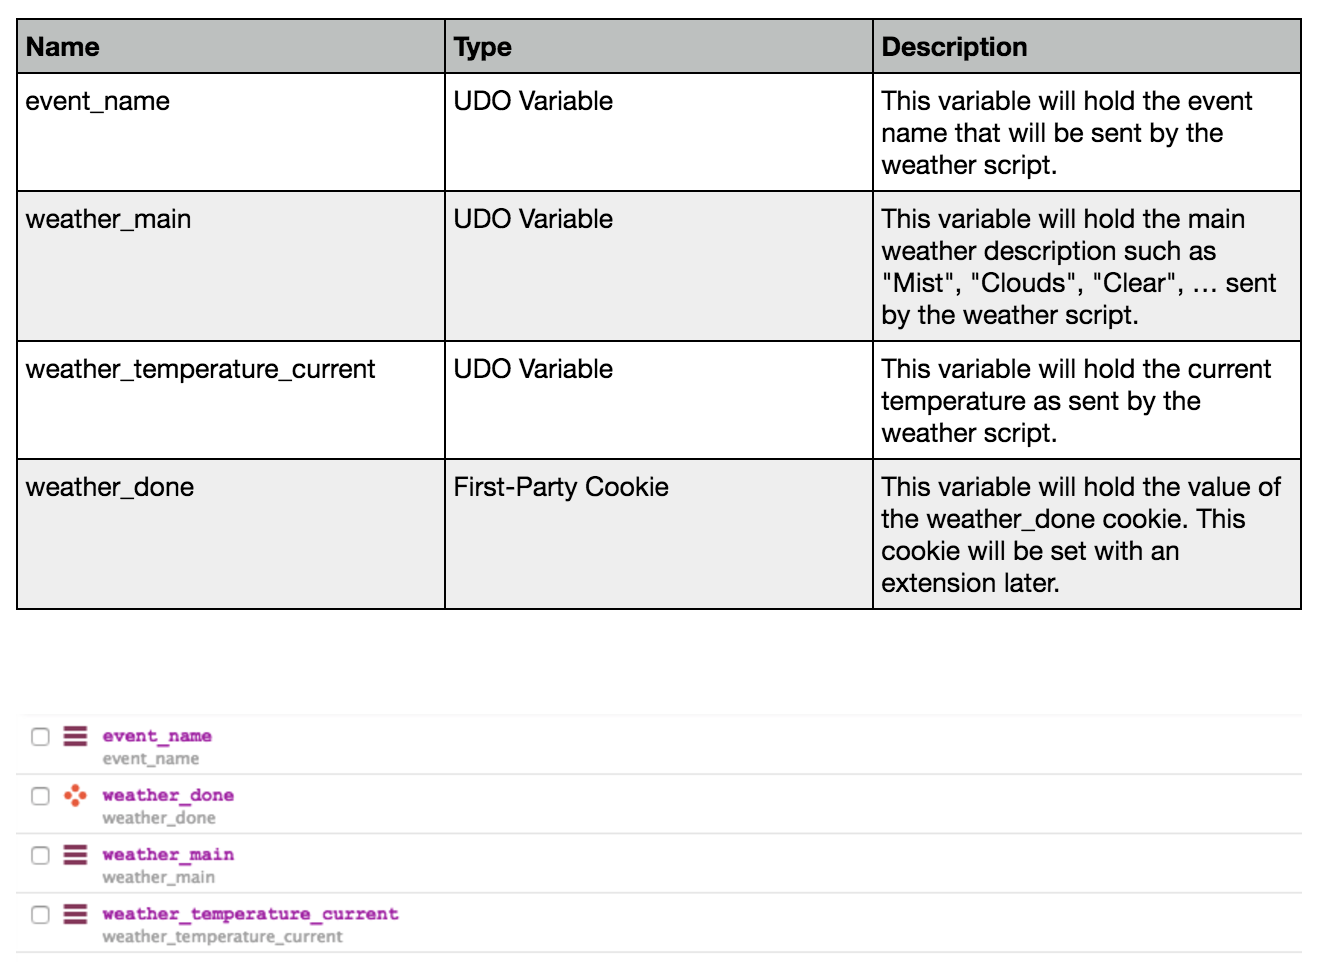
When our script is working, we need to set up our Data Layer. Log in to Tealium IQ and go to Data Layer. Add the following variables:
Load Rules
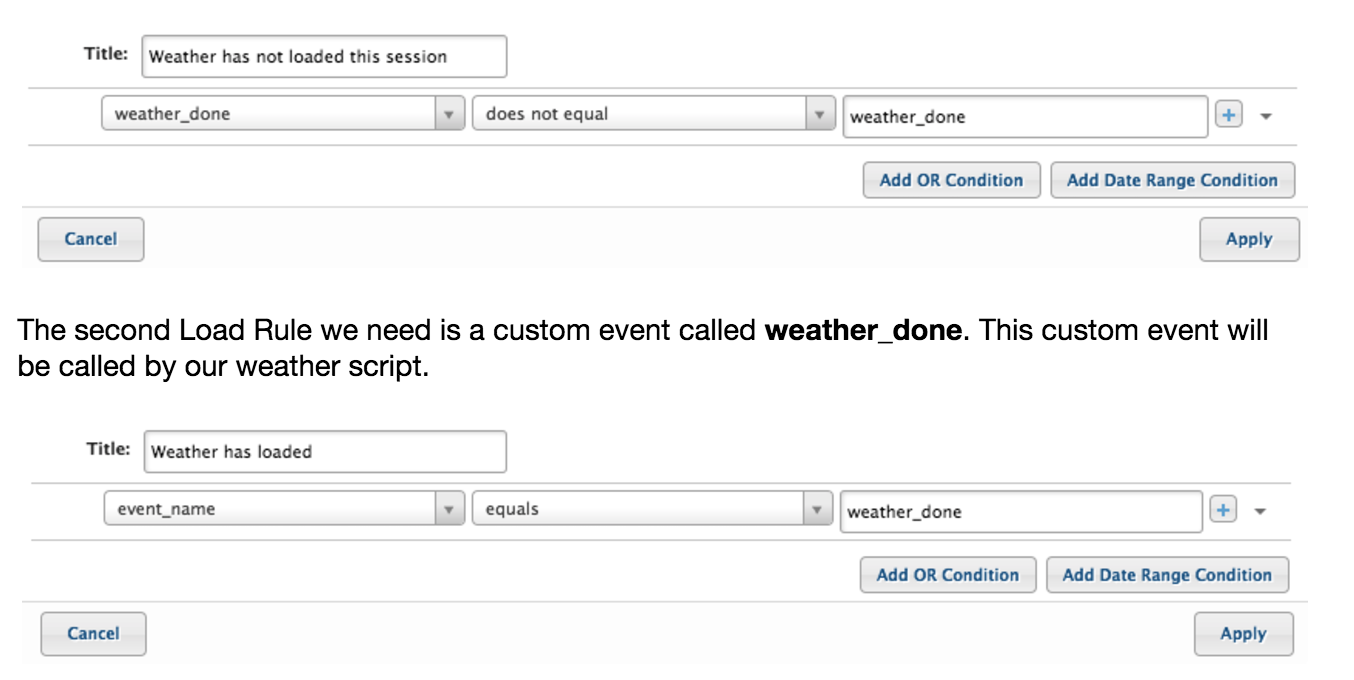
After we’ve set up the Data Layer, it’s time to set up the Load Rules. To do this, click the Load Rules tab.
The first Load Rule we need, will fire whenever the weather script has not yet loaded in the current session. We can check this by checking if our weather_done cookie does not equal weather_done.
Tags
We also need to configure two tags. We can do this in the Tags tab.
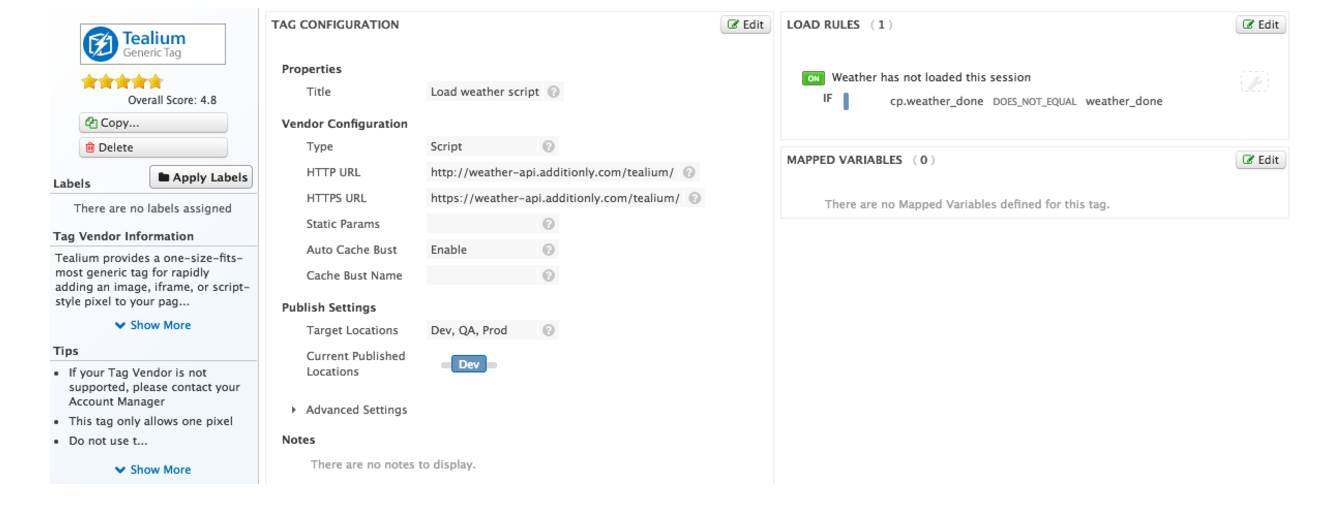
The first Tag will load the weather script if weather has not loaded before in this session. Click the Add Tag button and add a new Tealium Generic Tag.
Tag Configuration
 Load Rules
Select Weather has not loaded this session
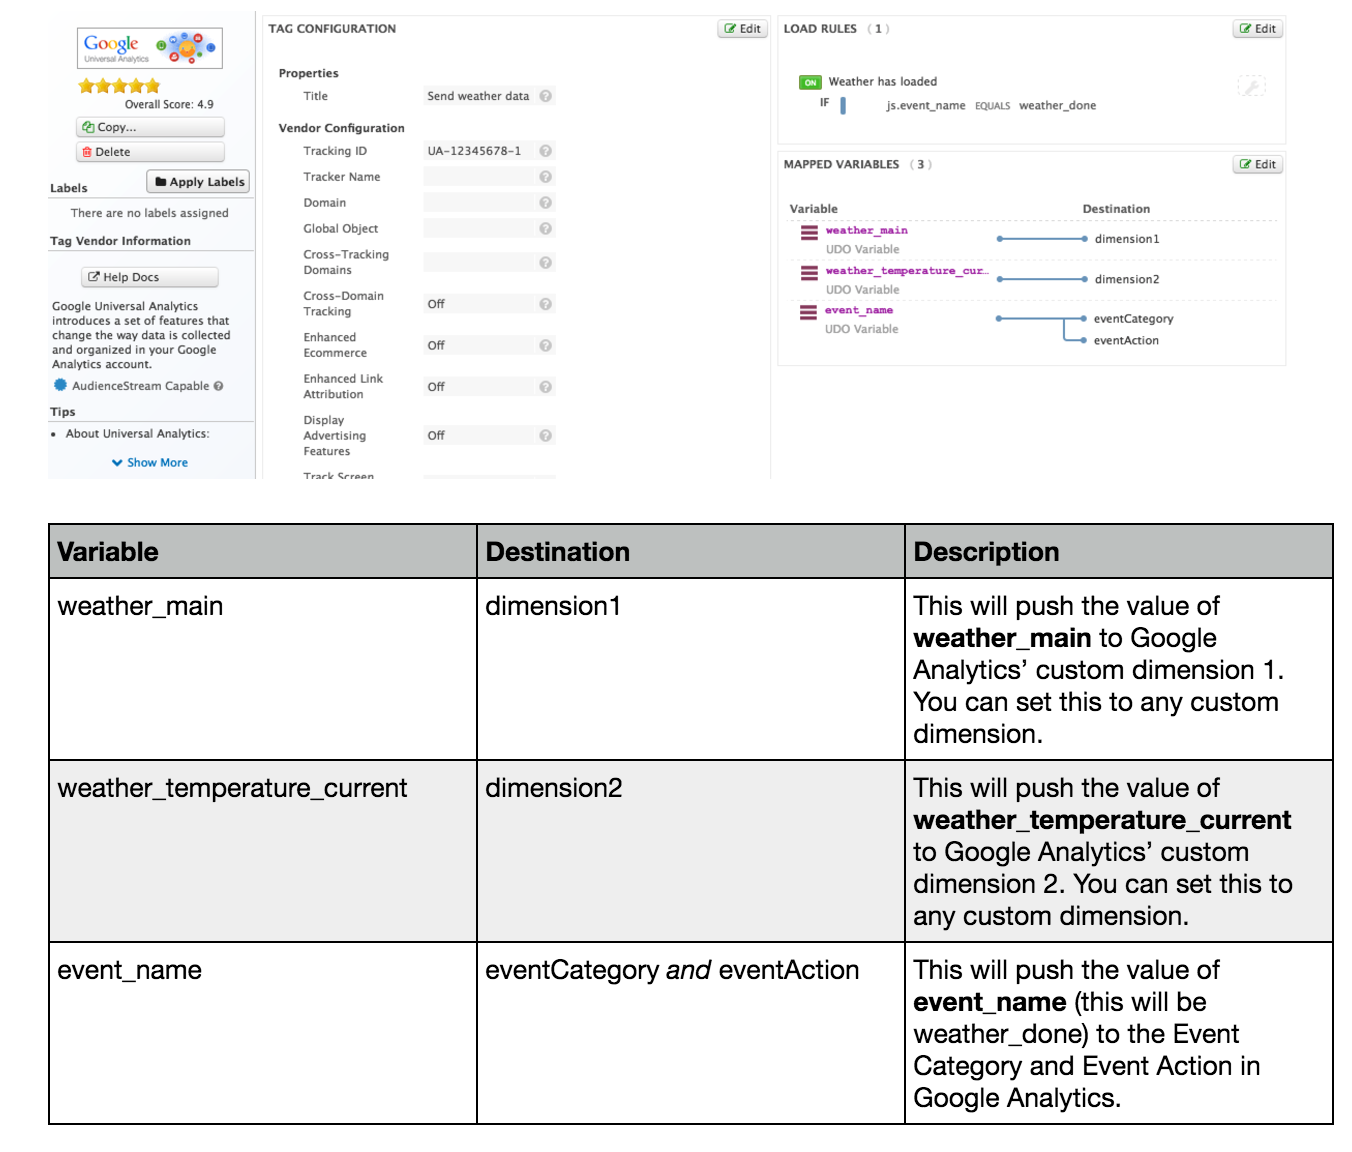
The second tag will send the weather data as custom dimensions to Google Analytics. Click the Add Tag button and add a new Google Universal Analytics tag.
Tag Configuration
Load Rules
Select Weather has loaded
Data Mappings
Extensions
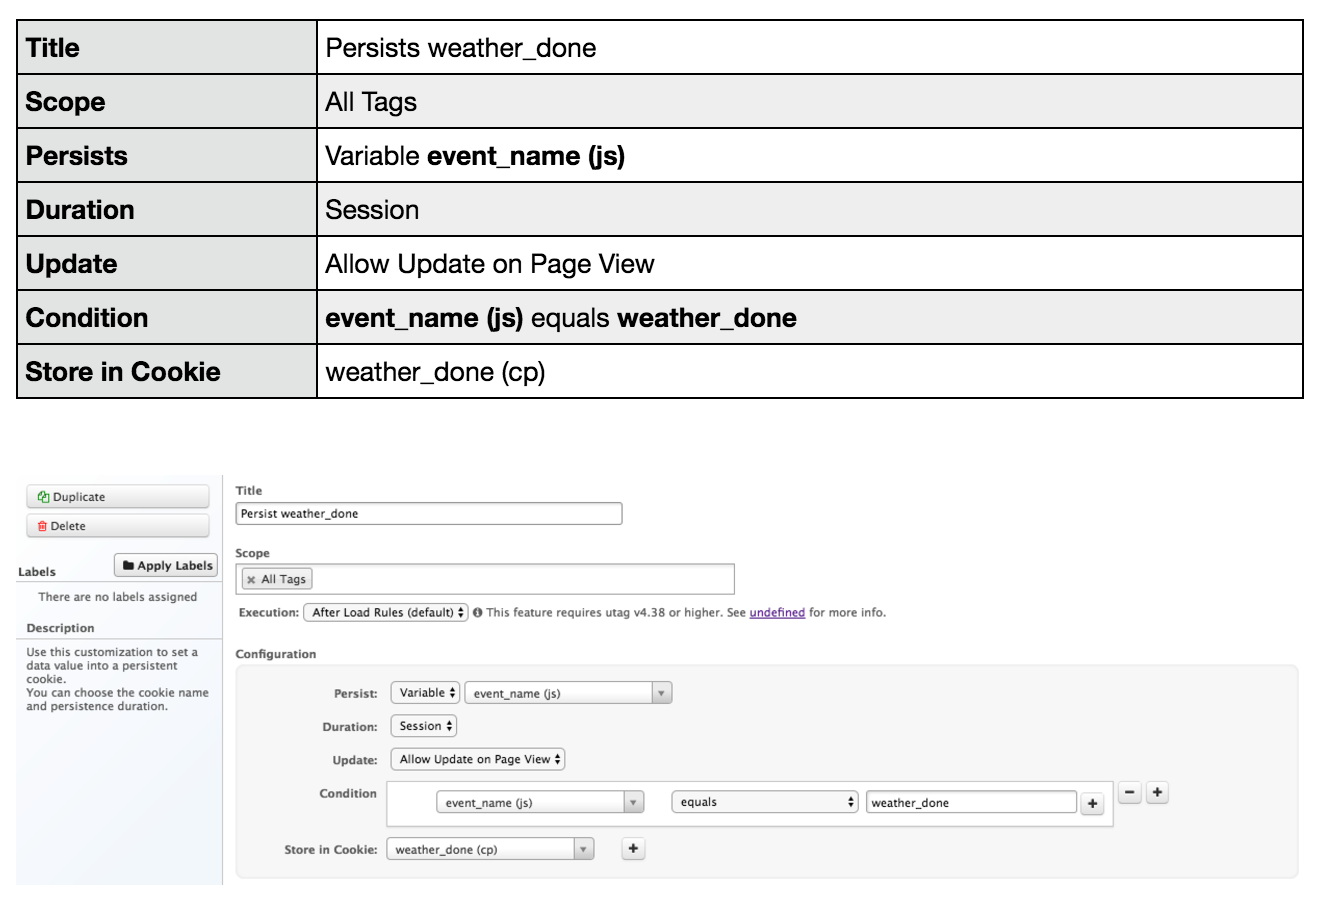
The last thing we need to do (before we publish) is to persist the fact that the weather has run in this session in a cookie. To do this, go to the Extensions tab.
Click the Add Extension button to add a Persist Data Value extension.
Save and Publish
Click the Save/Publish button to save the configuration and publish it.
Conclusion
Although some technical knowledge is required, you can see in the steps above that it’s not that difficult to add this invaluable data to your Google Analytics data with Tealium. Depending on your needs, or the needs of your client, other information can be added in a very similar way. The possibilities are endless: public transportation attendance, public holidays, stock prices…

David Peeters
| LinkedinThis email address is being protected from spambots. You need JavaScript enabled to view it.
