Introduction: What is a Viewport ?
The Viewport is defined by Google as “a framed area on a display screen for viewing information.” Basically, the Viewport is everything that is directly visible on your web page.
Note that the Viewport does not consider everything related to the browser (menu bar, address bar, etc.), the scroll bar or any type of pop-up over the top of a web page.

The Viewport is calculated as Viewport width x Viewport height and is calculated in pixel.
The Viewport size can thus vary depending on your browser (Chrome, Firefox, Safari, …), device (mobile, desktop, tablet, …), screen resolution, etc.
The Element Visibility
A web page is made of HTML element and those elements can appear in a viewport, but those element can also disappear from the viewport.
An HTML element can appear when:
- A page loads into a web browser window
- A user scroll up or down
- A browser tab becomes active
- A user’s action cause a DOM change
The Element Visibility Trigger will only work when the HTML element is actually visible in a web page.
How to define my trigger?
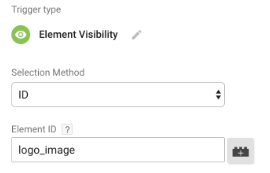
In GTM, you will have two options to base your trigger on: the ID and the CSS Selector.
The ID is easy to use if you have an element to track and that this specific element has a unique ID associated to it.
Let’s say that my logo ID is “logo_image”, then my trigger would be based on the ID and my Element ID would be logo_image.
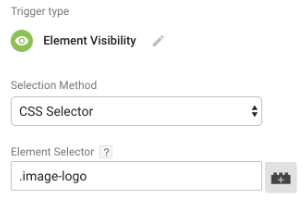
 The other method, the CSS Selector can be used for multiple elements to be tracked or when your element does not have a specific ID.
To create you trigger, you will have to know what is your Element selector. To do so, the extension SelectorGadget can prove to be very handy.
When you are on the web page containing the element you want to track, you simple need to click on the add-on in your browser window, then to select the element you want to track. The tool will display you the corresponding CSS selector that will be used in your trigger back in GTM.
If I take the same example of my logo image, after clicking on the image I want to track, the tool gives me the CSS selector to be used: “.image-logo”

Here is what should be filled in GTM:

Now that you defined which element should be tracked, you have different options to tailor when and where you Event should fire:
- The occurrence of your Event
- The minimum percentage visible
- The time on screen of the Element
- Additional filters
The occurrence of your Event
There, you will have to choose between three different options:
- Once per page
- Once per element
- Everytime an element appears on the screen
The minimum percentage visible
There you will have to define when you consider your element to be actually visible by the user. You can for example consider that once 50% of your element is in the viewport, the user has viewed it.
By default, this value will be set to 50% in GTM, but if you consider that the entire element should be in the viewport to be considered as viewed, you would need to put 100%.
The time on screen of the Element
This is the minimum amount of time the element needs to be in the viewport to be considered as viewed. This is important when you want to make sure that you element could had least have been taken into consideration.
Indeed, if you set it to 0.5 seconds, you might get a very high viewability ratio, but it is much probable that a lot of people would scroll through your page without taking any consideration with you element.
Therefore, a good practice would be to set your triggering option between 2 and 3 seconds.
Additional filters
Let’s say that you have an element that is present on every page, but that you want to track its visibility only on a set of pages.
If we take the example of an e-commerce, you would want to track the element visibility only on the product pages.
There, you can add an extra filter by selecting for example the page paths that contain “product”.

Once you have defined you trigger in GTM, you will be able to create an Event to analyse your results within your Analytics and consider optimising the placement of your selected element.


